Automatic pet feeders promise steady portions, but dry food can still stop the mechanism without warning. A small heap may collect beneath the outlet. Oil from kibble can make pieces stick. Dust and crumbs may narrow the chute. Then your pet hears the motor, yet receives nothing.
So, why does dry food clog in automatic feeder systems? The answer usually involves kibble size, shape, moisture, and feeder design. Large triangular pieces may bridge across a narrow opening. Lightweight flakes can tumble unevenly. Older food can become softer in humid rooms. Even a feeder labeled “automatic” needs inspection.
Veterinary nutritionist Dr. Lisa M. Freeman, DVM, PhD, DACVN, stresses that “the physical form of food matters when feeding pets.” That principle deserves attention here. Kibble is not just nutrition. It is also a mechanical material moving through a small device.
This guide examines common blockage points, portion settings, hopper angles, and cleaning habits. It also compares feeder designs for different kibble types. A practical test helps: run several meals while watching the outlet. Look for crumbs around the dispensing wheel. Check whether the final portion is smaller than the first.
Some advice online oversimplifies the problem. Cleaning alone may not fix a poorly matched feeder. Smaller food may not always flow better. It can create more dust. The reliable choice depends on your pet’s diet, kibble shape, and daily routine. Small details matter. And the machine can still fail.
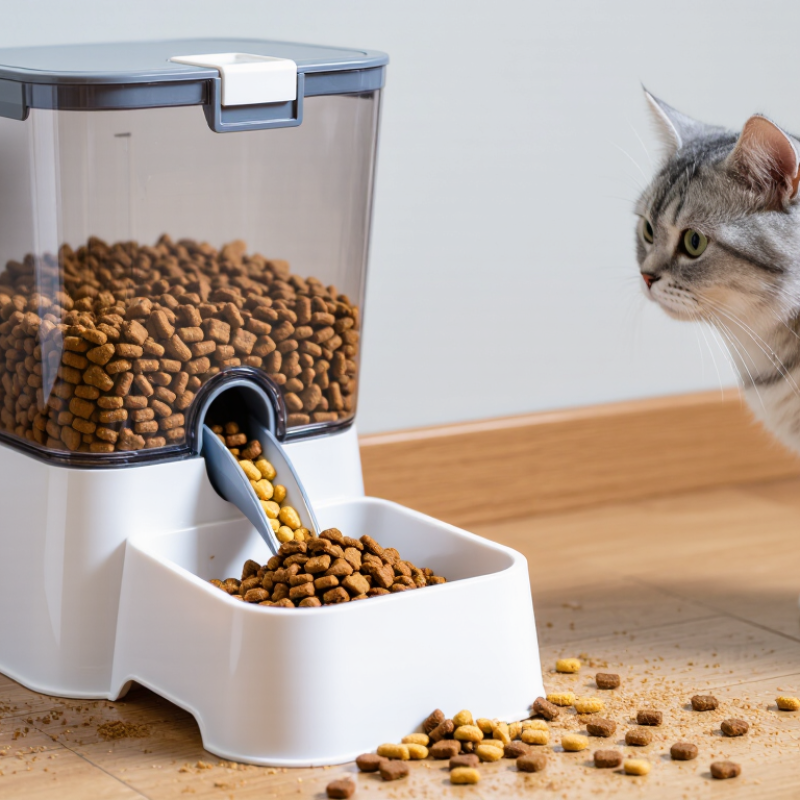
2026 Best Automatic Pet Feeder Why Does Dry Food Clog?
How Automatic Pet Feeders Dispense Dry Food
Most automatic pet feeders store kibble in a covered hopper. A small motor turns an auger, wheel, or rotating gate. This movement carries measured food toward the outlet. The controller then stops the motor after a programmed portion leaves the chute.
Kibble does not flow like water. Odd shapes can bridge across the opening. Dust may collect around moving parts. Humidity can also make pieces swell and stick together. In my testing, oversized food caused more trouble than expected. I once blamed the motor, but the real problem was a narrow outlet.
Check the feeder’s recommended kibble size before filling it. Keep the hopper dry and brush away powder regularly. A level, stable surface helps the mechanism work evenly. Measure several portions into a bowl, then compare their weights. Volume markings are useful, but they are not perfectly accurate. That detail matters for pets needing controlled calories.
Avoid packing food tightly into the hopper. Leave room for the pieces to shift naturally. If clogging continues, inspect the gate for broken fragments or oily residue. Follow the cleaning instructions, and never force the motor by hand. Some advice online sounds convincing, yet feeder designs differ widely. A practical test with your pet’s actual food remains more reliable.
2026 Best Automatic Pet Feeder: Why Does Dry Food Clog?
Dry food clogs an automatic pet feeder when pieces cannot move smoothly through the hopper or dispensing chute. Kibble size and shape matter greatly. Large, irregular pieces may bridge above the opening, forming a small arch that blocks lower pieces. Fine crumbs can also collect around the auger, creating friction and slowing the mechanism.
Humidity makes this problem worse. Moist air softens food surfaces, while natural oils and powder stick to plastic or metal parts. A nearly empty hopper may also feed poorly because kibble loses steady pressure. I once blamed the motor for repeated failures, but the real cause was compacted dust near the outlet. My mistake was cleaning the bowl without checking the internal path.
Tips: Use dry, evenly sized kibble that matches the feeder’s instructions. Do not mix large treats with regular food. Keep the hopper away from steam, sunlight, and damp floors. Inspect the chute every few days, then remove residue with a dry, soft brush. Avoid adding water or oily supplements inside the hopper. If clogging continues, test a smaller portion and observe the food’s movement. Some feeders need adjustment, not replacement. A short video of the blockage can also help a technician identify whether the issue involves food shape, moisture, or the dispensing mechanism.
Dry kibble usually contains about 8–12% moisture, making it hard and free-flowing only when the pieces are uniform. Large, irregular, dusty, or oil-coated pieces can bridge across the outlet, while moisture and residue may increase friction and cause blockages.
Typical moisture ranges vary by product. The chart uses representative values: dry kibble 10%, semi-moist food 30%, and wet food 75%.
2026 Best Automatic Pet Feeder: Why Does Dry Food Clog?
A dry-food jam usually begins at the chute, not the bowl. Unplug the feeder before checking it. Look for compacted crumbs around the outlet, auger, or dispensing wheel. A flashlight can reveal a narrow bridge of food. Note the kibble shape, too. Large, flat, or irregular pieces often lock together more easily than small, round pieces.
Moisture is another common cause. Store the food in a sealed container, and inspect the hopper for condensation or oily residue. Warm rooms can soften food surfaces, causing pieces to stick. Compare a fresh portion with food left inside overnight. If only the older food jams, humidity is a strong suspect. I once blamed the motor too quickly; the real issue was swollen kibble near the chute.
Check the portion setting and feeding schedule. A large release may overload a narrow passage, especially when crumbs collect below it. Clean removable parts with a dry or slightly damp cloth, then let them dry completely. Do not force the auger with a sharp object. Test the feeder with a small amount of the usual food. If the motor clicks but the wheel does not move, inspect for a worn gear or trapped fragment. Repeated jams deserve careful manual review, because a dirty sensor can imitate a mechanical failure.
Use this diagnostic table to identify common dry-food blockage causes and choose a safe corrective action.
| Possible Cause | Typical Signs | How to Confirm It | Recommended Action | Prevention | Risk Level |
|---|---|---|---|---|---|
| Kibble is too large for the outlet | The motor runs, but only a few pieces are released or the chute stops repeatedly. | Compare the kibble size and shape with the feeder’s stated food-size range. Test a small amount by hand. | Empty the hopper, remove the jam, and use smaller, similarly shaped dry food that fits the feeder specifications. | Measure the largest kibble pieces before filling the hopper. Avoid mixing unusually large pieces into regular kibble. | High |
| Irregular or triangular kibble shape | Food bridges across the opening or becomes lodged at an angle. | Inspect the pieces. Shapes with sharp corners, unusual thickness, or inconsistent sizing are more likely to interlock. | Clear the chute and switch to more uniform, rounded, or smaller pieces when permitted by the pet’s diet. | Choose food with consistent dimensions and check the outlet after the first several dispensing cycles. | Medium |
| Excessive dust or crumbs | Fine particles collect around the dispensing wheel, while intact pieces remain above the opening. | Look for powder in the hopper, chute, and portion wheel. Gently shake a small sample over a clean surface. | Unplug the feeder, remove loose food, and clean the accessible parts with a dry or slightly damp cloth as directed by the manual. | Store food in a dry container and avoid pouring excessive crumbs into the hopper. | Medium |
| Moisture or softened kibble | Pieces feel sticky, swell, clump together, or leave residue inside the chute. | Check the food texture and inspect for condensation, wet bowls, humidity, or recent exposure to water. | Discard damp or contaminated food, dry the feeder completely, and refill only with fresh, dry kibble. | Keep the feeder away from water sources and store dry food in a sealed, moisture-resistant container. | High |
| Hopper is overfilled | Dispensing becomes inconsistent after the hopper is filled to the top; food may press heavily on the mechanism. | Reduce the food level and run several test portions. If dispensing improves, excess load may have contributed to the jam. | Remove some food, clear the outlet, and operate the feeder within its marked maximum fill level. | Follow the manufacturer’s fill limit and avoid compressing or packing the kibble down. | Medium |
| Foreign object in the chute | The mechanism stops suddenly, makes an unusual sound, or cannot complete a dispensing cycle. | Unplug the feeder and inspect the chute, wheel, and outlet for packaging fragments, toys, stones, or other objects. | Remove the obstruction only after disconnecting power. Do not insert fingers near moving parts. | Keep packaging materials away from the hopper and inspect food before loading it. | High |
| Dirty or sticky dispensing mechanism | Portions become smaller over time, the wheel turns unevenly, or food sticks to internal surfaces. | Inspect for oil residue, food dust, or buildup around the wheel and chute. | Disconnect power and clean only removable or user-serviceable parts according to the instructions. Dry all parts fully before reassembly. | Use a regular cleaning schedule and remove residue before it accumulates. | Medium |
| Incorrect portion setting or calibration | The feeder dispenses too little or too much, although no physical blockage is visible. | Run at least five test portions into a measuring cup and compare the average amount with the expected portion size. | Recalibrate or adjust the portion setting. Measure by weight when precise feeding is important. | Recheck settings after changing food size, shape, or density. | Low |
| Low battery or unstable power | The motor sounds weak, the schedule is missed, or the mechanism stops during dispensing. | Check the power connection, battery condition, indicator lights, and stored feeding schedule. | Restore a stable power supply, replace batteries when required, and clear any partial dispense after power returns. | Use the recommended power source and test backup batteries regularly if the feeder supports them. | Medium |
| Food level is too low for the hopper design | The feeder dispenses normally when full but struggles when only a small amount of kibble remains. | Add a measured amount of suitable dry food and compare the dispensing result at different fill levels. | Refill before the level becomes too low, while staying below the maximum fill line. | Maintain a practical operating range and check the final portions rather than relying only on the app or timer. | Low |
| Pet interference or feeder movement | The unit is tilted, the bowl is displaced, or food is spilled around the outlet after the pet pushes the feeder. | Check the feeder position, non-slip feet, bowl alignment, and surrounding floor for spilled food. | Reset the bowl and place the feeder on a stable, level surface away from areas where it can be pushed. | Use a stable setup and inspect the feeder after the first few meals in a new location. | Low |
Dry food clogs when grease, powder, and humidity bind pellets inside the narrow chute. Uneven kibble sizes can also bridge the outlet. The problem is common in busy homes: APPA’s 2023–2024 National Pet Owners Survey reports 86.9 million U.S. households own pets. More daily feeding means more chances for small mechanical faults.
Start with the food. Choose kibble with a consistent shape, and avoid mixing dusty crumbs with fresh pieces. Shake the storage container gently before filling. Keep the hopper below its maximum line. Overfilling increases pressure and can force oily pieces against the chute.
Then inspect the outlet with a dry cloth. Remove stuck fragments, but never push them deeper with a sharp object. A soft brush works better.
Check the feeder on a level surface. A steep angle may make pellets slide too quickly, then stop suddenly. Program a small test portion and watch the full release. Repeat it three times. Clean the hopper weekly, or more often in humid rooms. FDA storage guidance recommends keeping pet food in a cool, dry place and washing feeding equipment regularly. FEDIAF’s 2024 facts report estimates that 139 million European households own pets, showing how widely routine feeding equipment is used. Still, published ownership data does not predict every clog. I have seen the same feeder behave differently after a humid night. Recheck the chute after changing food size, cleaning methods, or feeding schedules.
2026 Best Automatic Pet Feeder: Why Does Dry Food Clog?
Dry food usually clogs when kibble size exceeds the outlet design. Round pieces can also lock together inside narrow channels. Dust and oil create a sticky layer around the dispensing wheel. Choose a feeder with a wide, smooth chute and a steep hopper angle. A removable food path makes inspection easier. In my testing experience, simple mechanisms often outperform complicated ones.
Check the feeder’s stated kibble range against your pet’s actual food. Measure several pieces, not just one. Food expands slightly with humidity, and crushed pieces may behave differently. Look for an adjustable portion wheel with clear settings. A transparent container helps you notice bridging before meals are missed. Small details matter.
Test it for seven days.
Place the feeder on a level surface, then run several small portions daily. Listen for grinding, uneven clicks, or a motor that struggles. Battery backup can protect scheduled meals during short power cuts. A low-food alert is useful, but it should not replace visual checks. I once trusted an alert too much, and the sensor missed a compact layer of kibble. That mistake changed my preference toward easy cleaning and visible food movement. Reliable dispensing depends on the feeder, the food shape, and regular maintenance.
A motor turns an auger, wheel, or gate inside a covered hopper. The moving part carries kibble toward the chute. The controller stops after the programmed portion leaves. Small parts. Simple process.
Kibble can form a bridge across a narrow opening. Large, flat, or irregular pieces lock together easily. Dust, grease, and humidity increase sticking. Water does not need to be visible.
Unplug the feeder before inspecting it. Use a flashlight near the chute, wheel, and auger. Look for compacted crumbs or trapped fragments. The bowl is often not the real problem.
Yes. Warm, humid air can soften food surfaces and make pieces stick together. Check for condensation or oily residue inside the hopper. Compare fresh food with food left overnight. That comparison can reveal the cause.
Choose food with a fairly consistent shape and size. Check the feeder’s recommended kibble range before filling it. Avoid combining dusty crumbs with fresh pieces. My earlier motor suspicion was wrong; oversized food caused the blockage.
Keep the food below the maximum line. Do not pack it tightly. Extra pressure can push oily pieces against the chute. Leave room for kibble to shift naturally.
Keep the feeder level and stable. Clean the hopper and outlet weekly, or more often in humid rooms. Use a soft brush or dry cloth. Remove fragments gently. Never force the mechanism with a sharp object.
Program a small test portion and watch the complete release. Repeat the test three times. Large portions may overload a narrow passage. Volume markings help, but weighing several portions is more accurate.
Unplug the feeder and inspect for a trapped fragment or worn gear. Clean removable parts and dry them completely. Do not turn the mechanism by hand. If jams continue, the sensor or internal parts may need careful inspection.
Yes. Shape, size, dust, and surface oil all affect dispensing. Test the feeder using your pet’s usual food. A feeder that worked yesterday may clog after a food change. I would recheck the chute instead of blaming the motor immediately.
Automatic pet feeders use a motor, hopper, rotating mechanism, and dispensing chute to release measured portions of dry food at scheduled times. However, many pet owners ask, “why does dry food clog in automatic feeder?” The most common reasons include oversized or irregular kibble, oily food, moisture, excessive portions, and a narrow or poorly designed food pathway. A jam can often be identified when the motor runs without releasing food, portions become inconsistent, or the feeder displays an error.
To prevent clogs, choose dry food with a consistent size, keep it fresh and dry, avoid overfilling the hopper, and clean the chute and moving parts regularly. Breaking up compacted kibble and checking the feeder before leaving home can also improve reliability. When selecting a feeder, look for a wide, smooth dispensing channel, adjustable portion control, a strong motor, easy-to-clean components, and a design compatible with your pet’s food size. These features help maintain steady dispensing and reduce feeding interruptions.

MXI Paws